
Hooke Road Rock Crawler Stubby Front Bumper Review: Trail Armor & Real-World Gladiator Install
Front bumper upgrades are critical for off-road clearance, recovery capability, and front-end trail protection. To replace the factory plastic bumper and gain solid recovery points with integrated lighting, I picked up the Hooke Road Rock Crawler Stubby Front Bumper w/ LED Spotlight Bar (Part #BXG.3031).
Here is the honest breakdown of how the Hooke Road Rock Crawler Stubby Front Bumper unboxes, what hardware and bracket modifications you will need to make during assembly, and how it holds up on the trail.
Table of Contents
Unboxing & Delivery Reality Check
I placed the order directly on Hooke Road’s website for $399.99 on Wednesday, July 22, at 12:29 PM. It shipped via standard FedEx with tracking provided, arriving in just two days on Friday, July 24.
- Packaging Condition: The package weighed in at 92 pounds, wrapped in a thick corrugated box with heavy-duty poly strapping. The outer box arrived damaged from courier transit.
- Internal Protection: Inside, each modular section was bagged and taped, with loose Styrofoam blocks placed throughout.
- Delivery Scratches: Opening the bags revealed several scratches on the main bumper body where the powder coating had rubbed through to bare metal during transit.
- Packaging Comparison: Having installed Hooke Road’s rear bumper as well, the rear shipped with expanding molded foam that protected the finish completely. Hooke Road needs to implement that same expanding foam on this front bumper to prevent transit abrasion.
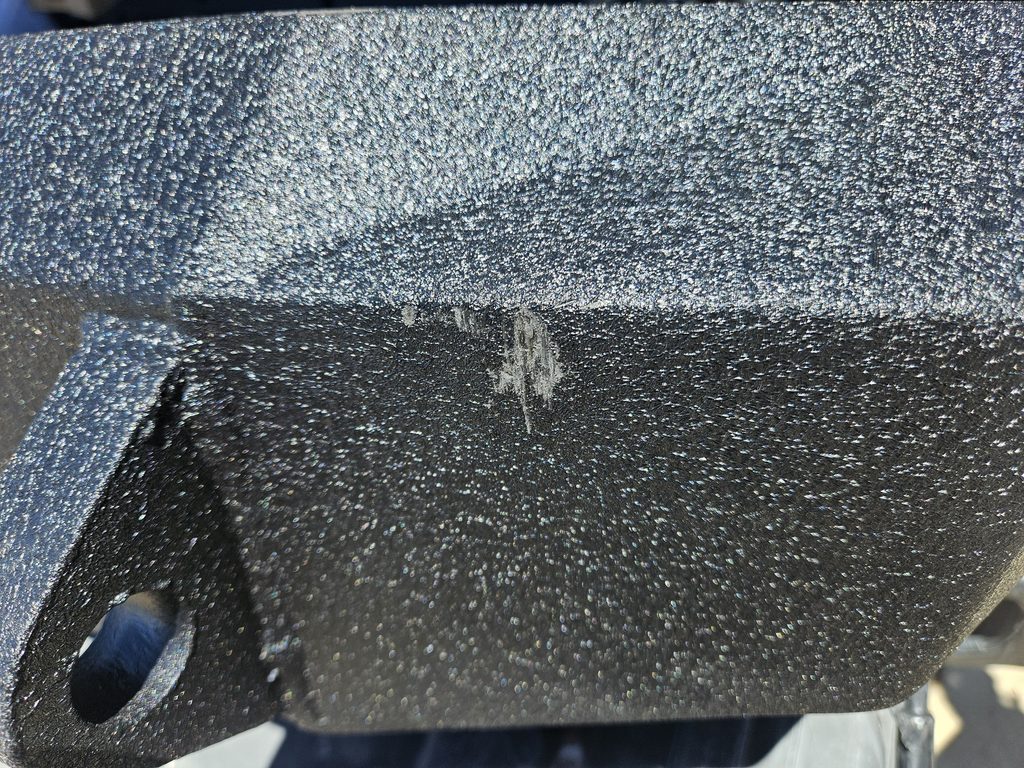
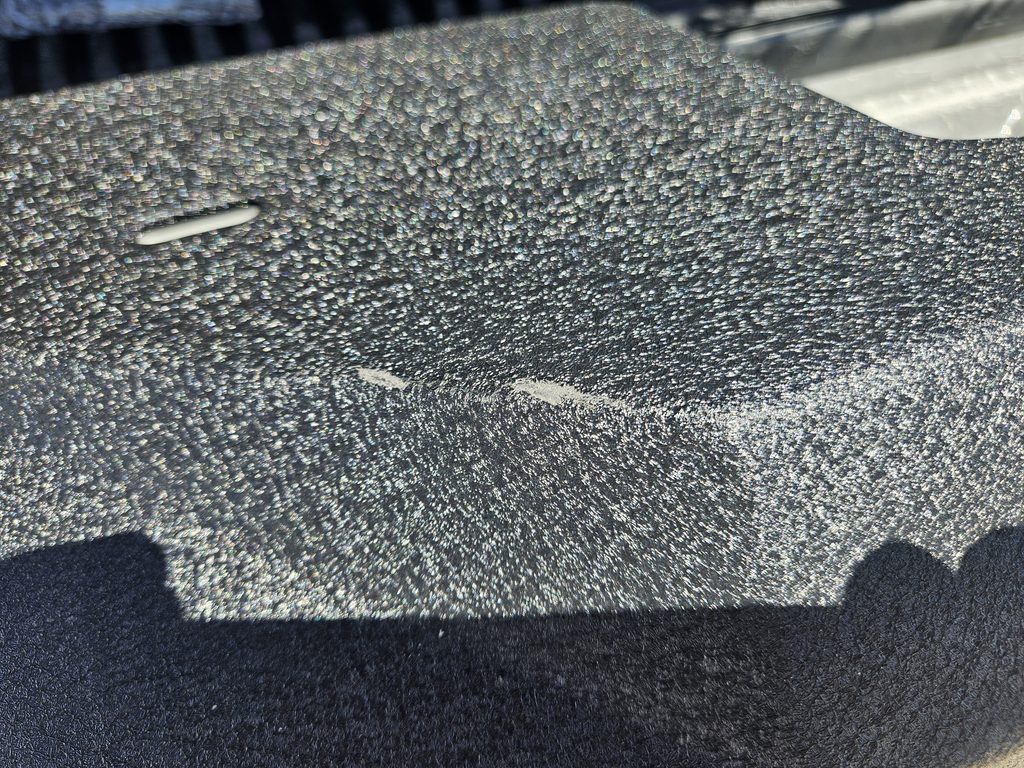
Powder coat rub-through scratches on the main bumper body down to bare metal
Hooke Road Rock Crawler Stubby Front Bumper: Assembly & Instructions
The Hooke Road Rock Crawler Stubby Front Bumper arrives in individual pieces and requires full modular assembly before it can be bolted to the vehicle.
- Paper vs. PDF Manual: The included paper instructions are small and diagram-heavy with almost no explanatory text. Fortunately, I had Hooke Road email the PDF instructions prior to ordering. The PDF version was substantially clearer and featured higher-resolution assembly steps.
- Light Bar Hardware Modification: The manual calls for black M8×20 bolts (Part P) to mount the upper light bar. The pre-cut mounting slots are oversized, causing the supplied M8 bolts and washers to slip straight through. Adding four standard fender washers still left a loose, sloppy fit. The fix was stepping up to M12×30 bolts from the hardware store, which filled the slots completely and torqued down securely.
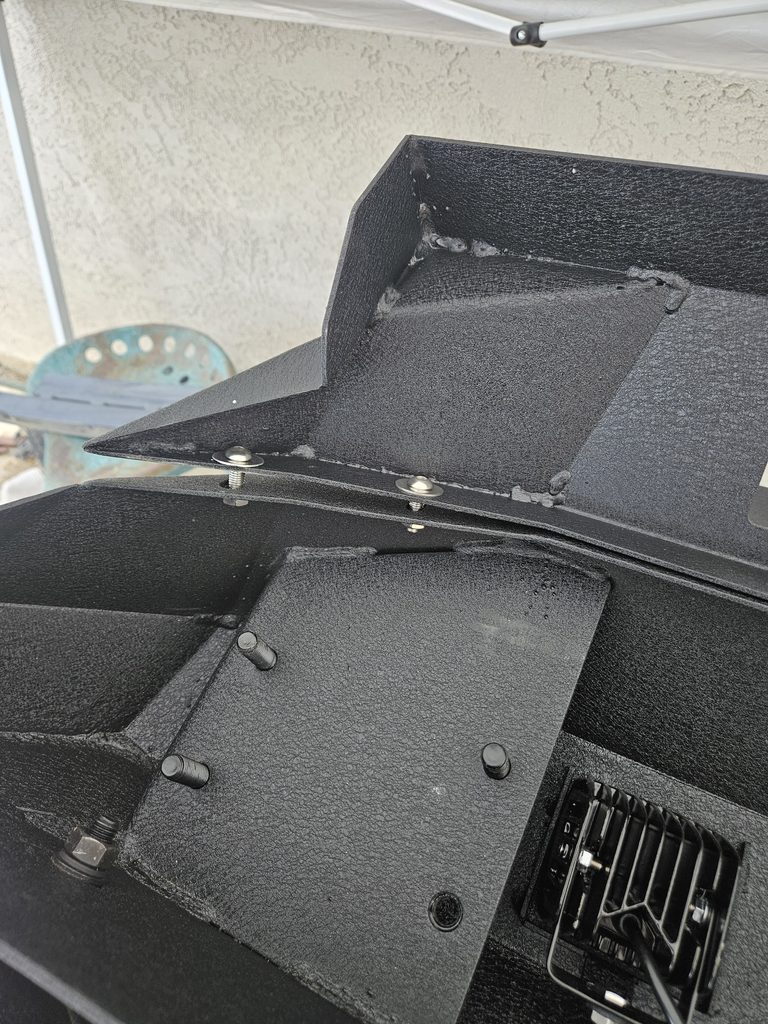
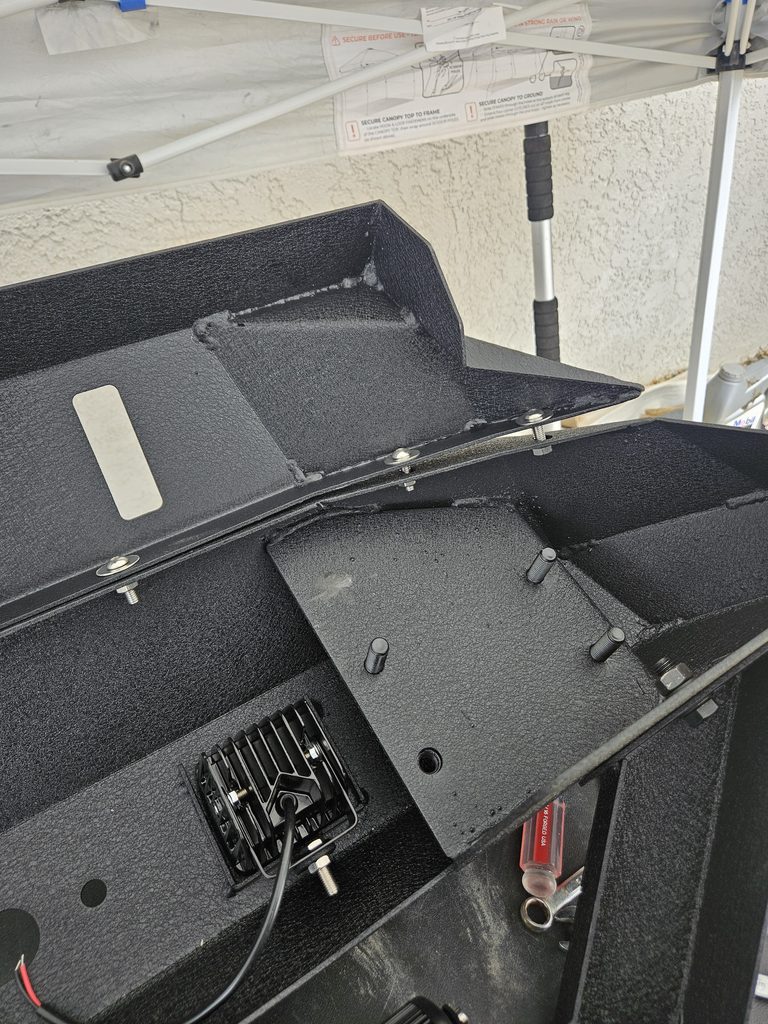
Underside assembly and upgraded M12 hardware providing solid clamping force]
Installation, Modifications & Clearances
Getting the Hooke Road Rock Crawler Stubby Front Bumper onto the Jeep Gladiator JT frame horns required hands-on adjustment, patience, and some clearancing work.
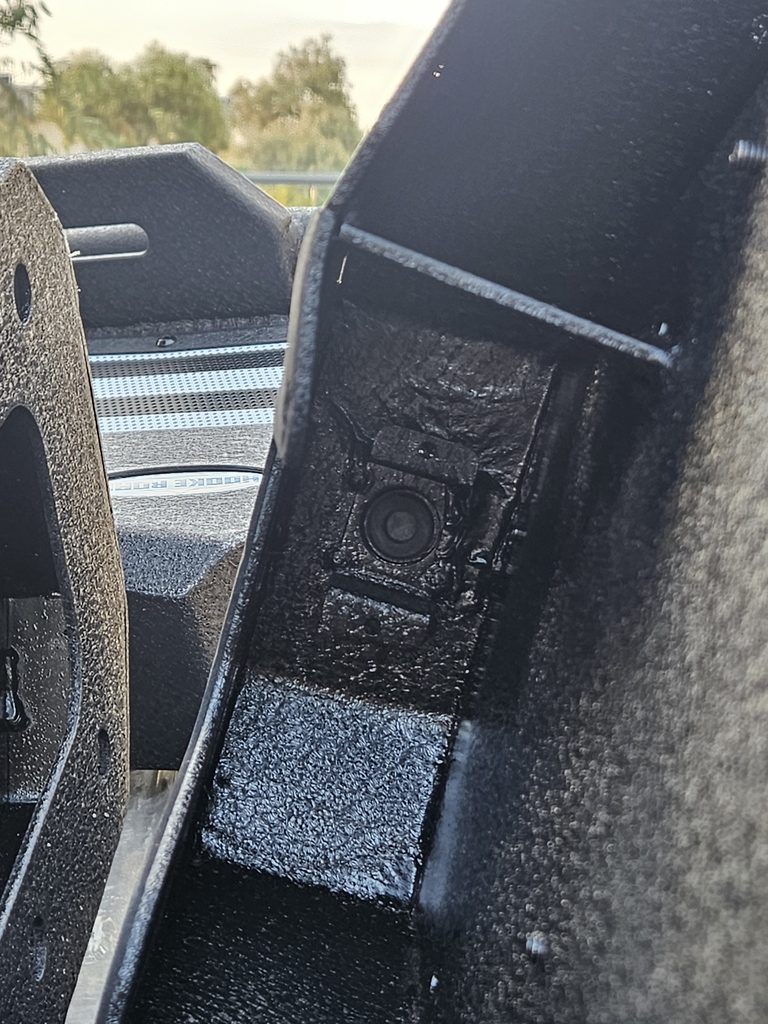
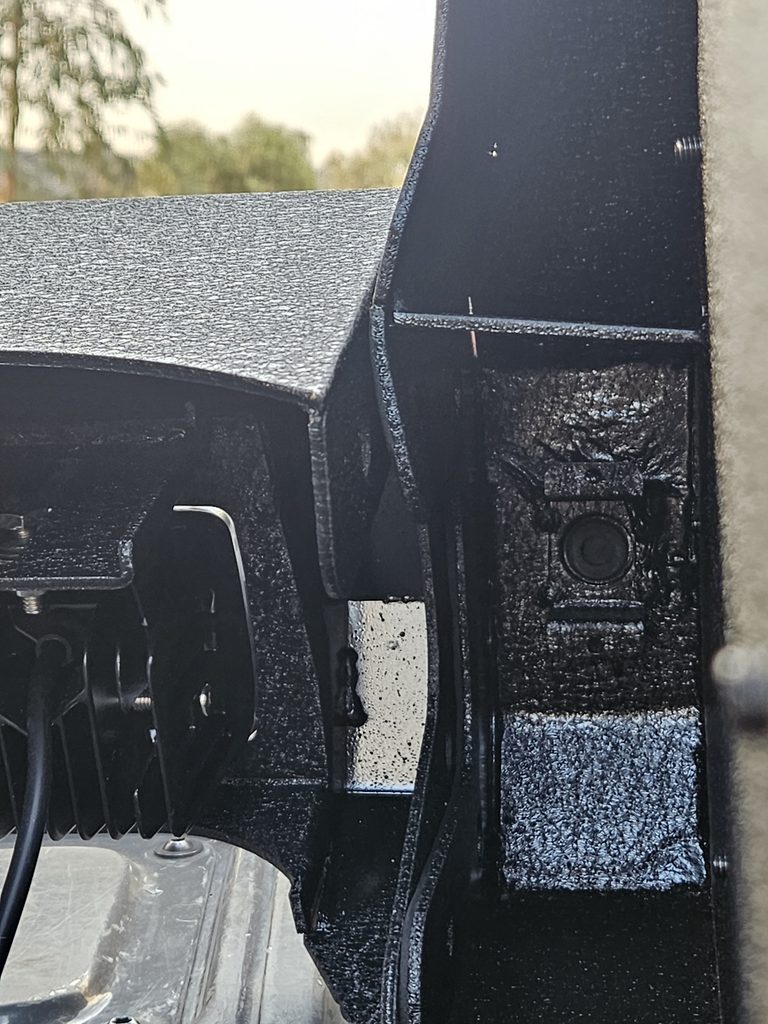
Frame horn mounting channels and tight bracket clearances
- The 8-Bolt Frame Horn Challenge: Getting all eight frame mounting bolts to line up was stubborn. Trying to install the main shell separately did not resolve the alignment. The only method that worked was getting the bumper perfectly level, starting all eight bolts through the frame holes by hand simultaneously, and then tapping the bumper body with a rubber mallet to seat it fully against the frame horns.
- Flip-Up License Plate Mod: The included flip-up license plate bracket is cut with clearance notches for wide 4-hole plates. Standard two-hole plates (like California plates) mount using the inner holes. Because the clearance notches are in the outer positions, the mounting nuts hit the bracket frame and prevent the plate from flipping open. Widening the inner notches with a Dremel or grinder gives the nuts room to slide past so you can access your winch fairlead.
- Winch Drop-In Clearance: Test-fitting a Badland Apex 12,000 lb winch showed that the integrated winch tray’s bolt pattern lines up cleanly with plenty of grille clearance. To drop the winch into the tray on this Hooke Road Rock Crawler Stubby Front Bumper, temporarily remove the two light bar mounting bolts, set the winch in place, and bolt the light bar back down over it.
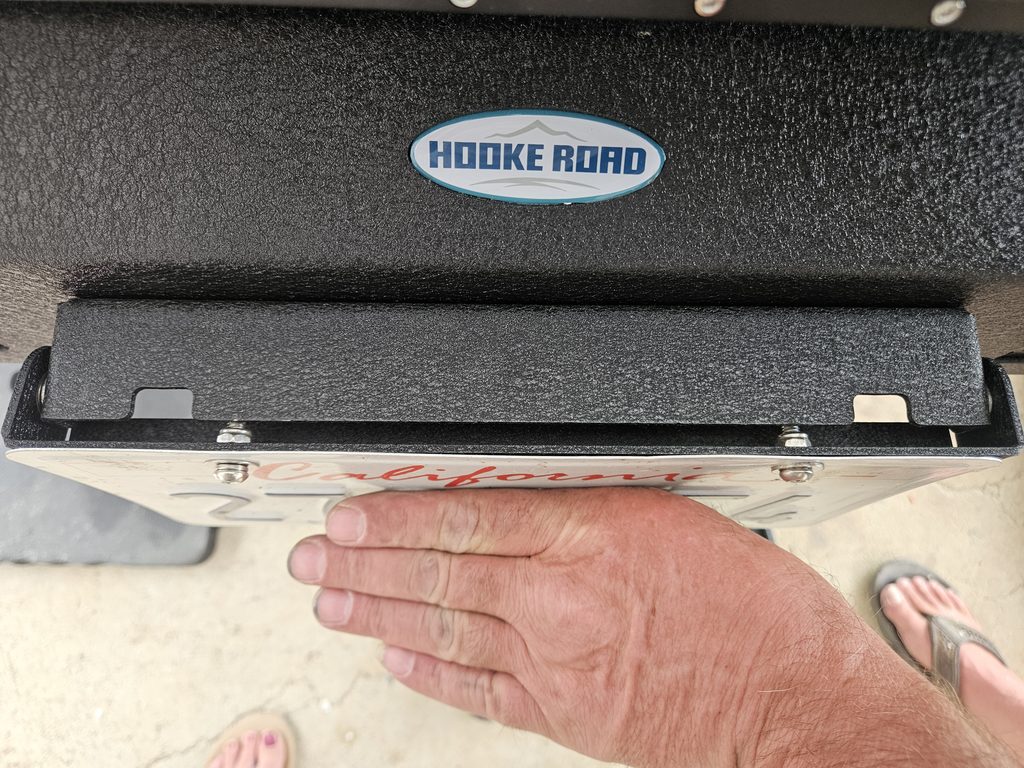
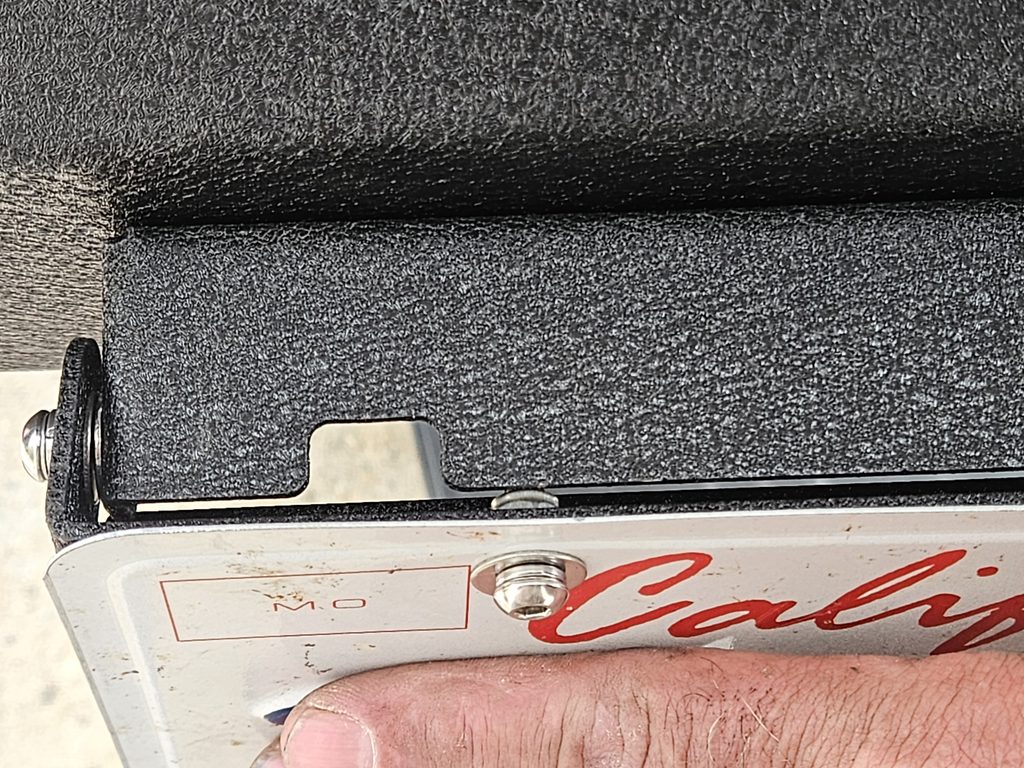
Lifting the flip bracket, California plate nuts hit the bracket frame
Lighting Output & Wiring
Much like organizing cabin wiring on my Overhead MOLLE Panel System[cite: 2], running front-end auxiliary lighting requires clean wire management.
- Wiring Setup: The included LEDs do not plug directly into the factory fog harness. The two pod light leads are very short and need extension harnesses to reach your switch source.
- No Cable Routing Channels: There is no internal wire routing space and nowhere to anchor zip ties inside the winch plate area. You must take extra care with your harness layout to ensure low-voltage lines never contact moving winch components.
- Output: Once wired into an auxiliary switch panel, the flood pods and light bar output a crisp, bright white beam that provides wide trail coverage and high contrast across rocky desert terrain.
Trail Performance: Stock vs. Stubby Clearance
The factory plastic front bumper hangs down low and extends directly in front of the front tires, creating a major obstacle when approaching ledges and boulders.s down low and extends directly in front of the front tires, creating a major obstacle when approaching ledges and boulders.
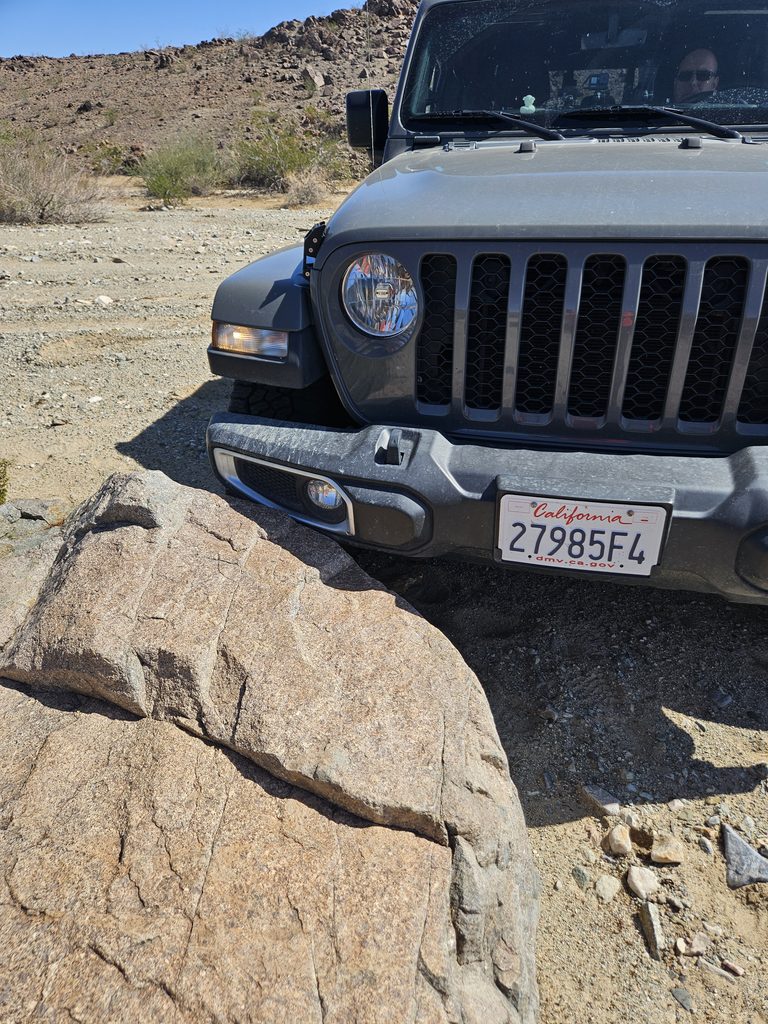
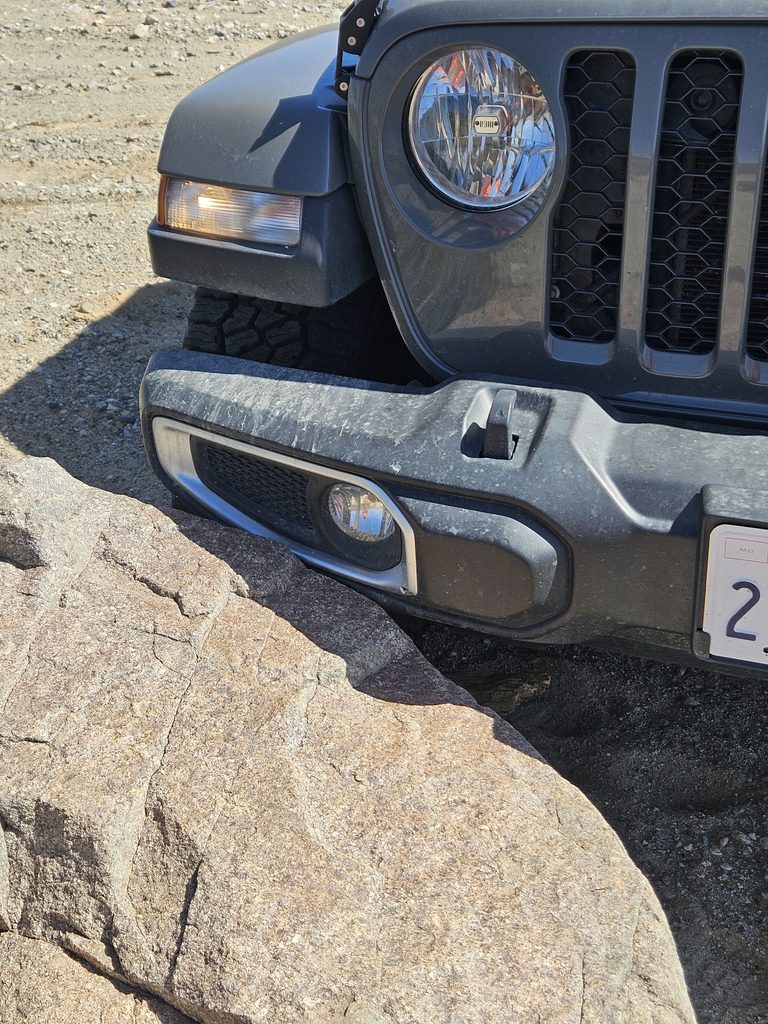
Factory full-width bumper hanging up directly against a rock obstacle before the tire can climb
Switching to the Hooke Road Rock Crawler Stubby Front Bumper eliminates front-tire overhang completely. The tires can make direct contact with rocks and vertical steps without bumper interference, and the 90+ lb heavy-gauge steel shell provides peace of mind if you do take a hard scrape.
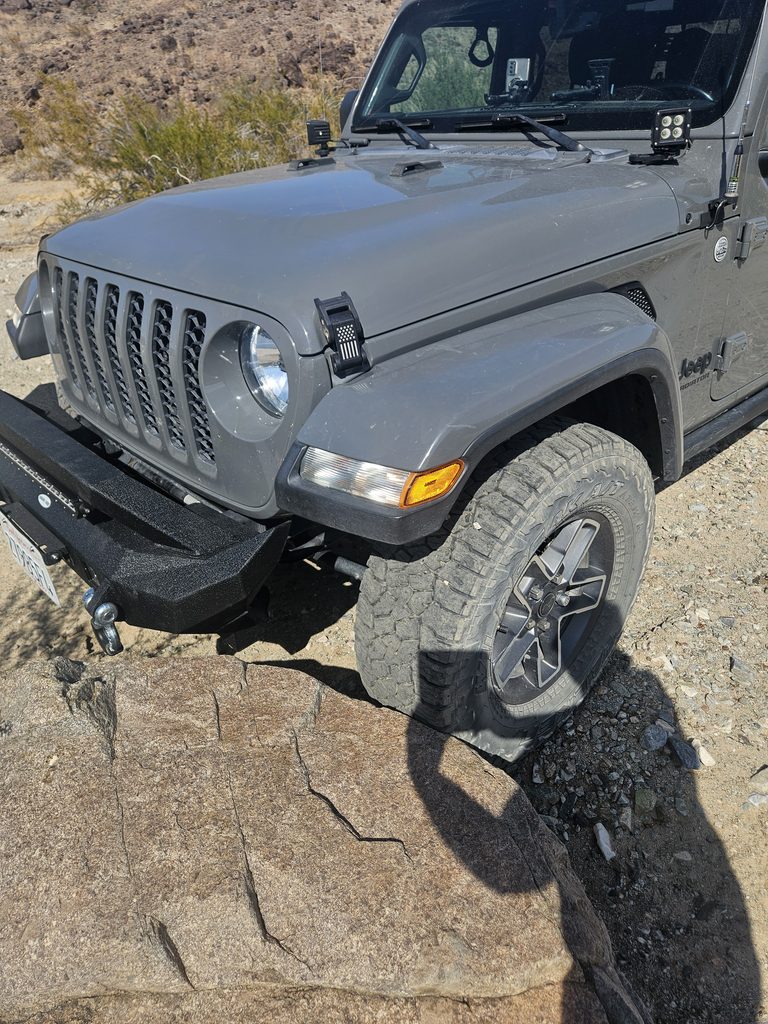
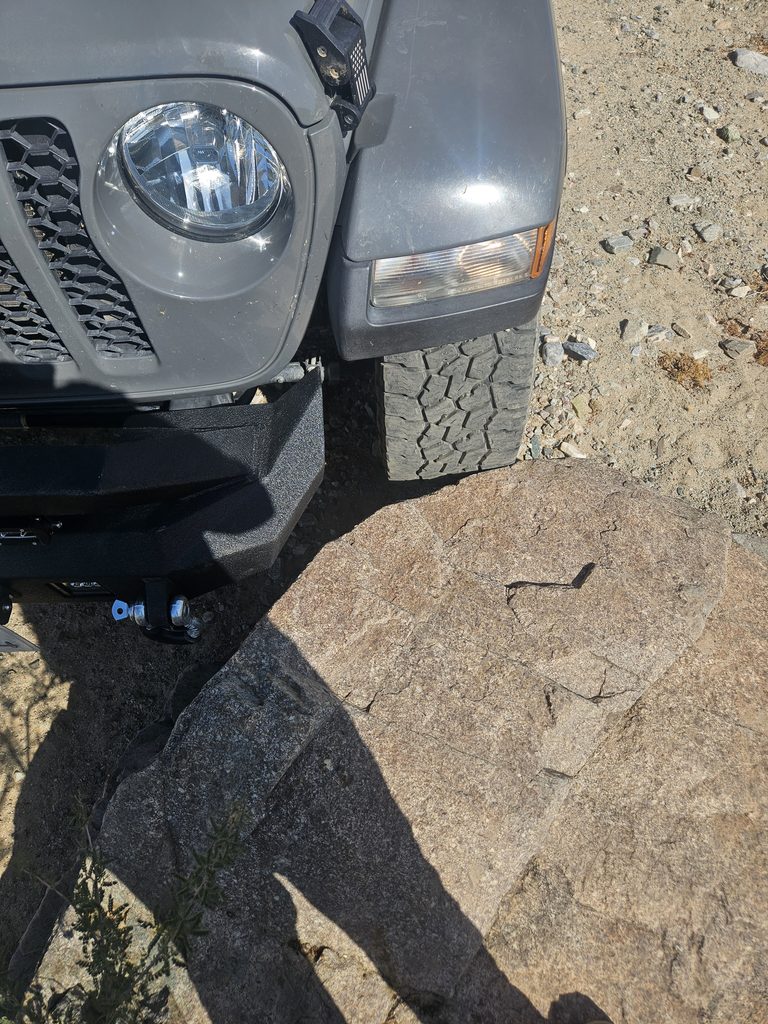
Direct tire contact on rock ledge with the stubby bumper leaving the entire track width open
Pros & Cons
Pros:
- Substantial Front Clearance: The stubby profile opens up full front tire approach angles for rocks and ledges.
- All-In-One Value: Includes a heavy-duty winch plate, full lower skid plate, hoop guard, center light bar, and two flood pods for under $400.
- Sturdy Construction: At 90+ pounds of steel, the assembly provides rigid front-end protection and dependable recovery points.
- Clean Winch Fitment: Accommodates a full-size 12,000 lb winch with direct bolt-hole alignment and solid grille clearance.
Cons:
- Loose Shipping Packaging: Loose Styrofoam allows powder-coat rub-through down to bare metal during transit.
- Under-Sized Light Bar Hardware: Included M8 hardware pulls through the mounting slots and must be upgraded to M12 bolts.
- Tight Frame Alignment: Requires exact leveling and rubber mallet persuasion to line up all eight mounting bolts.
- License Plate Bracket Interference: Flip-up bracket notches require grinding/slotting to clear standard 2-hole license plate hardware.
- Zero Wire Routing Provisions: No internal channels or zip-tie holes exist to secure lighting wires away from moving winch parts.
The Verdict
For a complete armor package under $400, the Hooke Road Rock Crawler Stubby Front Bumper delivers great trail protection, improved tire clearance, and bright auxiliary lighting. You will need to supply your own M12 light bar bolts, modify the flip-up plate bracket with a Dremel, and be prepared to muscle the frame bolts into place with a rubber mallet.
If you are comfortable tackling those minor hardware adjustments, it delivers rock-solid front-end trail capability.
- Product Build & Trail Functionality: 4.5 / 5 Stars
- Packaging & Shipping Protection: 3.0 / 5 Stars